Occasionally, Ninite Pro and/or the Windows Installer gets confused and cannot update a program. In this case, the message was “Zoom : Install failed – Could not verify installation (2), 1603 – 3620”.
Part of the problem may be that Windows 11 23H2 thinks that Zoom 6.1.1.41705 is installed, but Ninite thinks it needs to update 6.1.5.43316 to 6.1.6.43767.
![]()
When I tried to manually install the current version of Zoom (which is in fact 6.1.6.43767), the installer asked for a path, then said it could not uninstall the previous version.
When I tried to over-install the previous version (6.1.1.41705), the installer again asked for a path and would not complete.
I finally resolved this as follows:
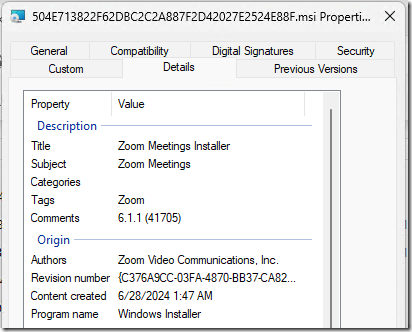
1. Windows reported that 6.1.1.41705 was installed on July 2, 2024. I went back in the cache of NiniteDownloads and found a big file from that date, 504E713822F62DBC2C2A887F2D42027E2524E88F. I added “.msi” to the end of that file name and looked at its properties, which confirmed that it is the Zoom installer for 6.1.1.41705. Copy that file to a local drive.

Side note: keep NiniteDownloads for at least 3-6 months. Many vendors do not publish previous versions of their software, so it’s the quickest way to get access to those old installers.
2. Over-installing with that old installer file didn’t work, but it was asking for a file named target.msi, so rename it to target.msi.
3. Open an administrative command prompt. Navigate to the file’s path and type msiexec /x target.msi to uninstall the old version, which worked without issue:
![]()
4. Use Ninite in interactive mode to install the current version of Zoom.


5. Let the user know that Zoom has been re-installed from scratch so they may need to log in again.
